Tag Archives: Tutorial

UXFileUpload: Store Uploaded Files in Database

Handling client files which are uploaded to a server is a common requirement for application. Files can be uploaded either to the FileSystem of your server or directly to the database as BLOB.

However, there has been a lot of debate about the best way to store the files. I’m sure there are many people who have strong favor for why one option is better than the other and vice versa.

So there must be interesting differences between the two solutions. Let’s have a brief comparison between these two options.

FileSystem – Pros and Cons

Storing the files on disk is much easier and simple to implement. Having the files in the filesystem allow accesing it from many different standard applications such FTP, web browser etc. and users as well, independent of access to the database itself etc.

Another advantage is that files on disk are easy to backup; you just copy the files to another location. This also makes it easier to do incremental backups; files that have already been backed up don’t need to be copied again.

Probably the most problematic issue is the loosely coupled nature of the files on disk as they have no strong relation with a record in the database. So, when you delete, say, a customer from the database, you may end up with an orphaned customer’s image/photo. There is no direct way to do a JOIN between the customer table and your images folder to determine what orphaned files you have left.

Nevertheless, to store uploaded files on disk, your web server needs permissions to write to the file system. This is easy to overcome by when you run your own server, but may prove to be more problematic in an ISP scenario.

Database – Pros and Cons

The loosely coupled nature of the files on disk problem will not happen when the uploaded files are stored in database. They have strong relation with a record in the database. It will automatically gets deleted when record of an employee is terminated.

Another advantage of storing files in a database is the fact that all data is contained in a single location. Make a backup of your database and you’re ready to go. No need to copy files, set up permission and so on.

Performance is probably one of the disadvantages of storing files in a database. Storing files in a database somehow degrading the performance as putting binary data into the database has obviously some overhead.

Another cons is that whenever you make a full backup of your database, all the files are included, whether they have been changed or not. If you copy your backups to a different machine or network for safety reasons, you need to move the entire backup file. With a file based solution, you can use diff programs that can determine which files have been changed since the last backup, and only download those.

Realizing that both methods have their pros and their cons, the question is: what to choose? Personally, due to its easier and simpler to be implemented, I’d prefer to store the uploaded files on FileSystem.

However, in this occasion, I will not discuss further on the pros and cons of the file storage matter. I’m going to present the solution on how to store the uploaded files of UXFileUpload ClientUI control to database.

UXFileUpload Introduction

UXFileUpload is a feature-rich file upload control supporting Silverlight 3, Silverlight 4, and WPF. It includes all standard features you expected in a file upload control, plus a multitude of innovative features that unique to UXFileUpload such as multiple upload worker process, comprehensive MVVM and commanding support, smart file chunk algorithm, very large file upload support, file-level cancellation, drag-and-drop files from operating system, and more.

Despite of the large number of features, UXFileUpload is designed for an ultimate ease-of-use. The simplest UXFileUpload control can be defined with only two properties set, the ServiceUrl and the TargetFolder property. You set the ServiceUrl property to a value that determines the absolute web address where the server-side handler is configured to accept the file upload requests. The TargetFolder determines where the files should be stored in the server.

ClientUI includes a built-in ASP.NET server-side handler that you can use to accept the file upload requests from the UXFileUpload control. When using the built-in server-side handler, you can set the TargetFolder to a relative path in your web server, for an instance, ~/Upload.

Creating a Simple UXFileUpload Control

The following code shows the most basic configuration of a UXFileUpload control.

<Intersoft:UXFileUpload ServiceUrl="http://localhost:9041/UXFileUploadHandler.ashx"
                        TargetFolder="~/ClientBin/Assets/Documents" />

You need to register the server-side upload handler in your ASP.NET web project in order for the UXFileUpload control to work properly. For more information configuring the server-side handler for the upload control, see How-to: Configure ASP.NET Server-side Handler for UXFileUpload.

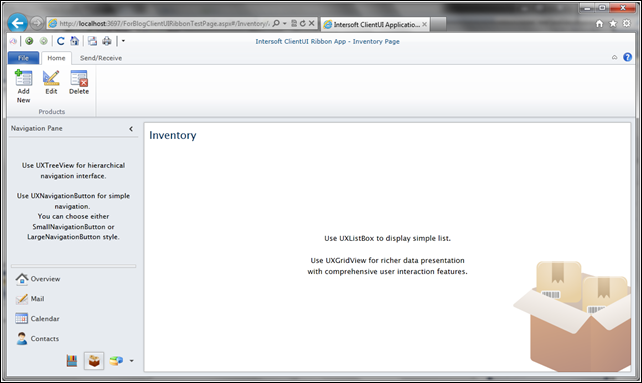
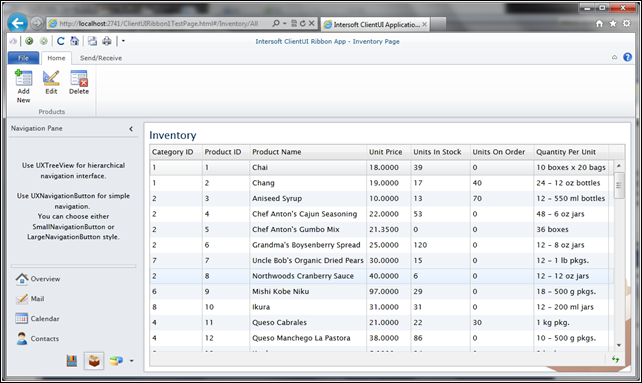
When viewing the control in either design or runtime, you will find the results similar to the illustration in the following:

image

With the upload control shown above, users can start to add files immediately by clicking the Add Files command in the toolbar and click on the Start Upload command to start uploading the selected files.

Once the Start Upload command is invoked, the file upload request will be handled by UXFileUploadHandler.ashx server-side upload handler. The uploaded files will be stored inside the Upload folder of the server.

In order to store the uploaded files to database instead of keep them in file system, we need to prepare following items.

  • Add and configure database which will be used as file storage.
  • Add and configure custom UXFileUpload handler.

Adding and Configuring Database

A database, called Files.mdf, is added into the App_Data folder of the web project. This database has Files table which consist of following fields.

Column Name Data Type Allow Nulls
Id uniqueidentifier False
FileData varbinary(MAX) True
OriginalName nvarchar(50) False
DateCreated datetime False

A Stored Procedure, sprocFilesInsertSingleItem, will be used to insert a single item of file into Files.mdf database.

INSERT INTO Files
(
	Id,
	FileUrl,
	FileData,
	OriginalName
)
VALUES
(
	@id,
	@FileUrl,
	@FileData,
	@originalName
)

Adding and Configuring Custom UXFileUpload Handler

UXFileUpload implements a smart file chunk logic where multiple files can fit into a single upload request thus minimizing the client-server requests. With the smart file chunk logic, UXFileUpload allows you to upload very large files without have to worry about the performance and memory consumption in both client and server side. It is not necessary to change the maximum upload request length or other configuration in the server-side to accommodate the large files upload using the UXFileUpload control.

The built-in UXFileUpload server handler is designed with a great level of customizability, allowing you to inherit the UXFileUploadHandler class and override the properties as necessary. We can also customize the upload post processing logic, by overriding the provided methods.

We will create a custom UXFileUpload handler that will store the uploaded files into the database by overriding the OnUploadCompleted method. Within this method, we can find all the information we need, such as: the number of uploaded files; the file path of uploaded files; saved name of the uploaded files; etc. In OnUploadCompleted we have files that has been completely uploaded. This is important to ensure that there is no file problem such as corrupted files or incomplete files during the saving of the files to the database.

Generally, the custom handler will process each of uploaded files and do the following:

  • Read and manipulate the file using FileStream class.
  • Invoke sprocFilesInsertSingleItem stored procedure to store the file on Files.mdf database.
  • Delete the specified file from the location specified in TargetFolder property of UXFileUpload.

Open the UXFileUpload project and add a class library project, named as ExtendedUXFileUploadHandler.

image

Add the following code into the DatabaseFileUploadHandler.cs file.

public class DatabaseFileUploadHandler : UXFileUploadHandler
{
    protected override void OnUploadCompleted(List<FileUploadInfoResponse> uploadedFiles)
    {
        if (uploadedFiles.Count > 0)
        {
            int FilesNumber = uploadedFiles.Count;

            for (int i = 0; i < FilesNumber; i++)
            {
                byte[] fileData = ReadFile(uploadedFiles[i].TargetFilePath);
                string originalName = uploadedFiles[i].SavedName;

                using (SqlConnection mySqlConnection = new SqlConnection(
                      @"Data Source=.\SQLEXPRESS;AttachDbFilename=|DataDirectory|\Files.mdf;
                           Integrated Security=True;Connect Timeout=30;User Instance=True")) { // Set up the Command object SqlCommand myCommand = new SqlCommand("sprocFilesInsertSingleItem", mySqlConnection); myCommand.CommandType = CommandType.StoredProcedure; // Set up the ID parameter SqlParameter prmId = new SqlParameter("@id", SqlDbType.UniqueIdentifier); prmId.Value = uploadedFiles[i].ID; myCommand.Parameters.Add(prmId); // Set up the FileData parameter SqlParameter prmFileData = new SqlParameter("@fileData ", SqlDbType.VarBinary); prmFileData.Value = fileData; prmFileData.Size = fileData.Length; myCommand.Parameters.Add(prmFileData); // Set up the OriginalName parameter SqlParameter prmOriginalName = new SqlParameter("@originalName", SqlDbType.NVarChar, 50); prmOriginalName.Value = uploadedFiles[i].SavedName; myCommand.Parameters.Add(prmOriginalName); // Execute the command, and clean up. mySqlConnection.Open(); bool result = myCommand.ExecuteNonQuery() > 0; mySqlConnection.Close(); } File.Delete(uploadedFiles[i].TargetFilePath); } } base.OnUploadCompleted(uploadedFiles); } private static byte[] ReadFile(string filePath) { byte[] buffer; FileStream fileStream = new FileStream(filePath, FileMode.Open, FileAccess.Read); try { int length = (int)fileStream.Length; // get file length buffer = new byte[length]; // create buffer int count; // actual number of bytes read int sum = 0; // total number of bytes read // read until Read method returns 0 (end of the stream has been reached) while ((count = fileStream.Read(buffer, sum, length - sum)) > 0) { sum += count; // sum is a buffer offset for next reading } } finally { fileStream.Close(); } return buffer; } }

The ReadFile function will reads the source file into a byte array. The Read method of FileStream object returns zero only after reaching the end of the stream. Otherwise, Read always reads at least one byte from the stream before returning. Finally, close the current stream and releases any resources associated with the current stream when Read method returns zero.

After completing the read process and set up the required parameter, fileData byte array will then be inserted into Files table by invoking the sprocFilesInsertSingleItem stored procedure.

Finally, delete the uploaded file from the specified path after execute the stored procedure.

Before running the solution, build the project and add the reference of ExtendedUXFileUploadHandler.dll into the web project. Then re-define the handler in Web.Config file into the following.

<configuration>
  ...
  <system.web>
        <compilation debug="true" targetFramework="4.0" />
      <httpHandlers>
        <add verb="*" path="UXFileUploadHandler.ashx"
             type="ExtendedUXFileUploadHandler.DatabaseFileUploadHandler, ExtendedUXFileUploadHandler"/> </httpHandlers> </system.web> <system.webServer> <handlers> <add name="UXFileUpload" verb="*" path="UXFileUploadHandler.ashx"
           type="ExtendedUXFileUploadHandler.DatabaseFileUploadHandler, ExtendedUXFileUploadHandler" /> </handlers> </system.webServer> ... </configuration>

Save all the changes and run the project.

Add files to be uploaded and click Start Upload. After the uploading process completed, the uploaded files is no longer available in the TargetFolder location. The file is now stored in database.

image

image

In this post, we have learnt how to store uploaded files of UXFileUpload to database by overriding the UXFileUpload handler.

Click here to download the sample project and feel free to drop me a line in the comment box if you find that this post useful, or have any questions and feedback regarding this topic.

Regards,
Yudi Ariawan

Create Rich Outlook Style Silverlight Application in Minutes

Recently I was assigned to create a simple Silverlight project that shows a list of data with full editing support. The first thing that comes to my mind is using the ClientUI project template as a first step to start working on this task.

After spending about 30 minutes trying all the project templates that come with Intersoft WebUI Studio 2011 R2 SP1, I decided to start the project using Intersoft ClientUI Ribbon Application template. This project template allows the creation of rich Silverlight application with rich Ribbon interface and integrated navigation interfaces.

Intersoft ClientUI Ribbon Application template is ideal to build business applications with relatively large modules and features. The template ships with predefined MVVM infrastructure that demonstrates how to use UXRibbonBar as a command placeholder that dynamically change its content based on the active module. It also includes fully-functional MVVM examples such as Mail and Calendar which are implemented with the advanced data controls available in ClientUI.

Building rich application using this Ribbon project template is easy and straightforward. In this blog post, I’ll share some of my experiences building the project such as adding the navigation, customizing the ribbon through XML configuration file, and drop-in the data grid to display data.

Let’s get started!

Creating a new project from the Ribbon Application project template

We’ll start by creating a new Silverlight project using Intersoft ClientUI Ribbon Application project template. This project template is available after install the Premier edition or Intersoft WebUI Studio 2011 R2 (or newer) for Silverlight and WPF. To create a new Intersoft ClientUI Ribbon Application project, open Visual Studio and select File > New > Project… (or press Ctrl+Shift+N) from the menu bar. Select Intersoft ClientUI Ribbon Application from New Project window. Enter the appropriate details to create the new application project.

One nice feature of Intersoft project template on New Project window of Visual Studio is that you can have the Intersoft project template grouped under Intersoft Solutions node of Installed Templates tree view.

Intersoft ClientUI Ribbon Application Project Template

The project template contains several predefined configuration, assembly references, and code files such as Assets, Factory, Selectors and several XAML files. Click here to learn more about the structure of this project template.

When you run the project for the first time, you’ll see a fully-functional user interface such as shown below.

Project's User Interface

Creating Inventory UXRibbon Structure

I’m going to add a new module which will show list of products. The module will have its own ribbon bar control which employs three buttons: add new data; edit selected item; and delete selected item.

Inventory Module Ribbon Button

Three image files are added into the [SilverligthProject]\Assets\Images\Inventory folder as the icon for each of the button.

<?xml version="1.0" encoding="utf-8" ?>
<RibbonBar Name="Inventory">
  <RibbonTab Header="Home" IsSelected="True"
             ResizeOrder=""
             KeyTipAccessText="H">
    <RibbonTabGroup Name="Edit" Header="Products" MinimumSize="Large" IsCollapsible="false"
                    Icon="/ClientUIRibbon1;component/Assets/Images/Inventory/Inventory.png">
      <RibbonButton Content="Add New" MinimumSize="Large" TooltipHeader="New Item" TooltipContent="Create a New Item."
                    LargeIcon="/ClientUIRibbon1;component/Assets/Images/Inventory/AddExistingStandard_32.png"/>
      <RibbonButton Content="Edit" MinimumSize="Large" TooltipHeader="Edit Selected Item" TooltipContent="Edit Selected Item."
                    LargeIcon="/ClientUIRibbon1;component/Assets/Images/Inventory/Edit32.png"/>
      <RibbonButton Content="Delete" MinimumSize="Large" TooltipHeader="Delete Selected Item" TooltipContent="Delete Selected Item."
                    LargeIcon="/ClientUIRibbon1;component/Assets/Images/Inventory/Delete.png"/>
    </RibbonTabGroup>
  </RibbonTab>

</RibbonBar>

Instead of declaring the ribbon structure directly in the xaml page, the ribbon structure is defined in an xml file, RibbonInventoryData.xml. The file is located inside the [SilverlightProject]\Assets\Data folder.

RibbonFactory.cs class will read each element, attributes of the xml file; parse them to the appropriate object; and create the ribbon to be displayed.

Once the ribbon structure is configured, we need to initialize the ribbon data source and register the Inventory module so that the ribbon tab will be dynamically updated when user select Inventory module.

To initialize the ribbon data source, find InitializeRibbonBar() method in the RibbonPageViewModel.cs class and add a line as shown in the following code. *The class can be found in [SilverlightProject]\ViewModels folder.

private void InitializeRibbonBar()
{
    // Initializes application menu
    this.RibbonApplicationMenu = RibbonFactory.CreateMenu(RibbonDataFolder + "RibbonBarData.xml");

    // Initializes ribbon data sources
    this.RibbonData = new Dictionary<ModuleType, string>();
    this.RibbonData.Add(ModuleType.Overview, "RibbonOverviewData.xml");
    ...
    this.RibbonData.Add(ModuleType.Inventory, "RibbonInventoryData.xml");
}

Before running the project and showing the ribbon structure of Inventory module, we need to register the Inventory module in the UpdateRibbonTab method. UpdateRibbonTab is the method that will be invoked when users select a module.

internal void UpdateRibbonTab(ModuleType moduleType, object context)
{
    ...

    switch (moduleType)
    {
        case ModuleType.Calendar:
        case ModuleType.Contacts:
        case ModuleType.Inventory:
        case ModuleType.Mail:
            this.RibbonContextualGroups = RibbonFactory.CreateRibbonContextualTabGroups(RibbonDataFolder + this.RibbonData[moduleType]);
            this.RibbonTabs = RibbonFactory.CreateRibbonTabs(RibbonDataFolder + this.RibbonData[moduleType], context);
            break;

        default:
            this.RibbonTabs = RibbonFactory.CreateRibbonTabs(RibbonDataFolder + this.RibbonData[ModuleType.Overview], context);
            break;
    }

    this.ActiveModule = moduleType;
}

Save all the changes and run the Silverlight application project.

The ribbon structure for Inventory module has been successfully added. When users click/select the Inventory module from the navigation pane, the Add New button; Edit button; and Delete button will be shown.

UXRibbon for Inventory Module

Displaying The Product List with UXGridView

In this part, we are going to display a list of products. The list will be presented in an UXGridView control.

In this project, UXGridView is bound to WCF RIA Services. In this post, I will not describe in detail about how to configure the application to become WCF RIA Services-enabled; creating the data model; etc. I’d like to suggest you to refer to Intersoft ClientUI MVVM Data Application (WCF RIA SP1) project template. To learn more, see Walkthrough: Create New Intersoft ClientUI MVVM Data Application (WCF RIA SP1) Template.

Once the data repository of Products is completely added, Add UXGridView control and bind the ItemsSource property with Items property from ProductsViewModel; and bind each column of the UXGridView to their corresponding property of ProductsViewModel respectively.

<Intersoft:UXGridView Intersoft:DockPanel.IsFillElement="True" ItemsSource="{Binding Path=Items}"
                        AutoGenerateColumns="False">
    <Intersoft:UXGridView.Columns>
        <Intersoft:UXGridViewTextColumn Header="Category ID" Binding="{Binding CategoryID}"/>
        <Intersoft:UXGridViewTextColumn Header="Product ID" Binding="{Binding ProductID}"/>
        <Intersoft:UXGridViewTextColumn Header="Product Name" Binding="{Binding ProductName}"/>
        <Intersoft:UXGridViewTextColumn Header="Unit Price" Binding="{Binding UnitPrice}"/>
        <Intersoft:UXGridViewTextColumn Header="Units In Stock" Binding="{Binding UnitsInStock}"/>
        <Intersoft:UXGridViewTextColumn Header="Units On Order" Binding="{Binding UnitsOnOrder}"/>
        <Intersoft:UXGridViewTextColumn Header="Quantity Per Unit" Binding="{Binding QuantityPerUnit}"/>
    </Intersoft:UXGridView.Columns>
</Intersoft:UXGridView>

Save all the changes and run the project.

UXGridView in Inventory Module

The Inventory module now has had a ribbon structure and will display a list of product in the ContentFrame.

Adding Commanding and Enabling/Disabling UXRibbon Button Based on UXGridView Selected Item.

In this part, I’d like to set the enable/disable state of each ribbon button based on the selected item of UXGridView. By default, the Add New UXRibbonButton is enabled since user should be able to add new item at any time. When no item is selected in UXGridView, Edit and Delete button should be disabled. They will be enabled when item(s) are selected.

In UXGridView, when a row is selected, the SelectedItem property will be automatically synchronized. I can bind this property to my ViewModel to capture the currently selected item. This property is then converted to a Visible/Collapsed and then consumed by IsEnabled property of UXRibbon button to determine whether the UXRibbon button is enabled or not.

Several questions arise when I started to check the feasibility to implement this approach.

  • The Inventory.xaml page and the UXRibbon are located in different view. Each of them has their own ViewModel. Implementing converter seems not as easy as I thought earlier.
  • The xml file of ribbon structure is processed by RibbonFactory.cs class by implementing parser. I need to ensure whether the ribbon button parser is equipped with binding parser or not.

I’m pretty sure there must be an elegant solution for a simple scenario such as this. So I decided to explore this project and hope to find an example that can be applied to my scenario.

After spending about 15 minutes exploring the project, clues are spotted when Mail module is opened. Some of the ribbon buttons are disabled when no message is selected.

This is exactly what I’m looking for!

It turns out that DelegateCommand play an important role in such scenario as shown in the Mail module. ClientUI provides DelegateCommand, a specialized command object that can be used to handle a delegate directly in the view model, and still can be bound to the view through binding. Furthermore, the DelegateCommand takes advantage of the routed command concept in which the IsEnabled state of the command sources will be automatically synchronized depending on whether the command can execute.

Many thanks to ClientUI development team who has extended the commanding framework to support MVVM through built-in DelegateCommand class. Not only this, they also have made this project template brilliantly. I mean it and don’t intend to exaggerate about what I say. Building Silverlight application based on Intersoft’s project template is considerably easy, even for beginners. I started to learn the implementation of DelegateCommand on Mail module and reset the plan to implement this scenario to be as follow.

There are three UXRibbon button: Add New; Edit; and Delete. Each button is bound to the AddAction; EditAction; and DeleteAction DelegateCommand respectively.

RibbonInventoryData.xml

<?xml version="1.0" encoding="utf-8" ?>
<RibbonBar Name="Inventory">
  <RibbonTab ...>
    <RibbonTabGroup Name="Edit" ...>
      <RibbonButton Content="Add New" MinimumSize="Large" TooltipHeader="New Item" TooltipContent="Create a New Item."
                    LargeIcon="/ClientUIRibbon1;component/Assets/Images/Inventory/AddExistingStandard_32.png"
                    Command="{Binding AddAction}" CommandParameter="AddNew"/>
      <RibbonButton Content="Edit" MinimumSize="Large" TooltipHeader="Edit Selected Item" TooltipContent="Edit Selected Item."
                    LargeIcon="/ClientUIRibbon1;component/Assets/Images/Inventory/Edit32.png"
                    Command="{Binding EditAction}" CommandParameter="Edit"/>
      <RibbonButton Content="Delete" MinimumSize="Large" TooltipHeader="Delete Selected Item" TooltipContent="Delete Selected Item."
                    LargeIcon="/ClientUIRibbon1;component/Assets/Images/Inventory/Delete.png"
                    Command="{Binding EditAction}" CommandParameter="Delete"/>
    </RibbonTabGroup>
  </RibbonTab>
  ...  
</RibbonBar>

ProductsViewModel.cs

public class ProductsViewModel : EditableGridViewModelBase<Product>
{
    public ProductsViewModel()
    {
        this.AddAction = new DelegateCommand(AddCommandAction, CanAddAction);
        this.EditAction = new DelegateCommand(EditCommandAction, CanEditAction);
        this.DeleteAction = new DelegateCommand(DeleteCommandAction, CanDeleteAction);
    }

    public DelegateCommand AddAction
    {
        get;
        set;
    }

    public DelegateCommand EditAction
    {
        get;
        set;
    }

    public DelegateCommand DeleteAction
    {
        get;
        set;
    }

    ...

    private bool CanAddAction(object obj)
    {
        //this method validate whether or not AddNew button is active
        //In this sample, I will keep this button to be always active
        return true;
    }

    private bool CanEditAction(object obj)
    {
        if (this.SelectedProductItem != null)
            return true;
        return false;
    }

    private bool CanDeleteAction(object obj)
    {
        if (this.SelectedProductItem != null)
            return true;
        return false;
    }

    private void AddCommandAction(object obj)
    {
        MessageBoxServiceProvider.Show("add new row is performed", "Information",
                    Intersoft.Client.UI.Aqua.UXDesktop.MessageBoxButton.OK, Intersoft.Client.UI.Aqua.UXDesktop.MessageBoxImage.Information, null);
    }

    private void EditCommandAction(object obj)
    {
        MessageBoxServiceProvider.Show("edit selected row is performed", "Information",
                    Intersoft.Client.UI.Aqua.UXDesktop.MessageBoxButton.OK, Intersoft.Client.UI.Aqua.UXDesktop.MessageBoxImage.Information, null);
    }

    private void DeleteCommandAction(object obj)
    {
        MessageBoxServiceProvider.Show("delete selected row is performed", "Information",
            Intersoft.Client.UI.Aqua.UXDesktop.MessageBoxButton.OK, Intersoft.Client.UI.Aqua.UXDesktop.MessageBoxImage.Information, null);
    }
}

Binding Command to UXRibbonButton

In the next series of my blog post, I will add a final touch to this Ribbon application by displaying detail information of data (for adding and editing operation) in a form.

Download Sample Code

For your reference, the demo project can be downloaded here.

I hope that this project will help you to prepare a simple demo project and provide you with insights about how easy to start developing Silverlight project using Intersoft Silverlight project template.

I’d love to hear your feedback so be sure to drop your comments in the box below.

Regards,
Yudi